SpringMVC简介
- SpringMVC是一个web框架,围绕
DispatcherServlet设计; - DispacherServelt的作用是将请求分发到不同的处理器。
- DispatcherServlet是一个实际的Servlet,它继承自HttpServlet类。
- SpringMVC和许多其他的MVC框架一样,以请求为驱动,围绕一个中心servlet分派请求及提供其他功能。
- 传统MVC架构:
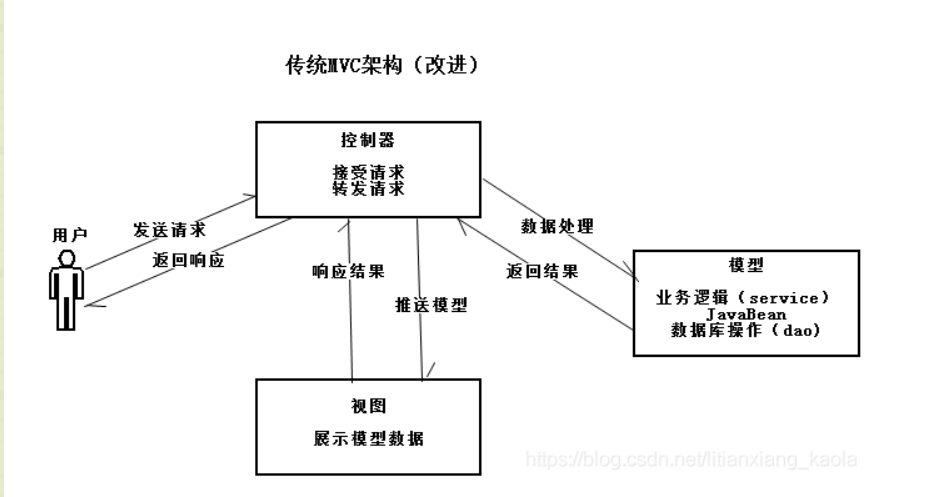
SpringMVC执行原理
- SpringMVC核心架构:

快速入门
- 建立一个web支持的项目;
- 配置maven的资源过滤问题:
<build>
    <resources>
        <resource>
            <directory>src/main/java</directory>
            <includes>
                <include>**/*.properties</include>
                <include>**/*.xml</include>
            </includes>
            <filtering>false</filtering>
        </resource>
        <resource>
            <directory>src/main/resources</directory>
            <includes>
                <include>**/*.properties</include>
                <include>**/*.xml</include>
            </includes>
            <filtering>false</filtering>
        </resource>
    </resources>
</build>- 导入相关依赖,主要是
spring-webmvc
<dependency>
    <groupId>org.springframework</groupId>
    <artifactId>spring-webmvc</artifactId>
    <version>5.3.3</version>
</dependency>- 配置web.xml
- web.xml的版本要4.0及以上;
- 在项目结构中,将maven导入的依赖,全部导入到artifacts的依赖中去。
- 注册DispatchServlet,管理SpringMVC配置文件,设置启动级别为1,映射路径为
/
<?xml version="1.0" encoding="UTF-8"?>
  <web-app xmlns="http://xmlns.jcp.org/xml/ns/javaee"
          xmlns:xsi="http://www.w3.org/2001/XMLSchema-instance"
          xsi:schemaLocation="http://xmlns.jcp.org/xml/ns/javaee http://xmlns.jcp.org/xml/ns/javaee/web-app_4_0.xsd"
          version="4.0">

      <!-- 注册servlet -->
      <servlet>
          <servlet-name>SpringMVC</servlet-name>
          <servlet-class>org.springframework.web.servlet.DispatcherServlet</servlet-class>、
          <!-- 通过初始化参数指定SpringMVC配置文件的位置,进行关联 -->
          <init-param>
              <param-name>contextConfigLocation</param-name>
              <param-value>classpath:springmvc-servlet.xml</param-value>
          </init-param>
          <!-- 启动顺序,数字越小,启动越早 -->
          <load-on-startup>1</load-on-startup>
      </servlet>

      <!-- 所有请求都会被springmvc拦截 -->
      <servlet-mapping>
          <servlet-name>SpringMVC</servlet-name>
          <url-pattern>/</url-pattern>
      </servlet-mapping>
</web-app>- 配置Springmvc-servlet.xml(web.xml关联的springmvc配置文件,放在resouce目录下)
<?xml version="1.0" encoding="UTF-8"?>
<beans xmlns="http://www.springframework.org/schema/beans"
       xmlns:xsi="http://www.w3.org/2001/XMLSchema-instance"
       xmlns:context="http://www.springframework.org/schema/context"
       xmlns:mvc="http://www.springframework.org/schema/mvc"
       xsi:schemaLocation="http://www.springframework.org/schema/beans
            https://www.springframework.org/schema/beans/spring-beans.xsd
            http://www.springframework.org/schema/context
            https://www.springframework.org/schema/context/spring-context.xsd http://www.springframework.org/schema/mvc https://www.springframework.org/schema/mvc/spring-mvc.xsd">


    <context:annotation-config/>
    <!--    自动扫描包,让指定包下的注解生效,由IOC容器统一管理-->
    <context:component-scan base-package="com.zestaken.controller"/>
    <!--    让springmvc不处理静态资源,如.css .js .html .mp3 .mp4-->
        <mvc:default-servlet-handler/>

    <!--    支持mvc注解驱动-->
        <mvc:annotation-driven/>

    <!--    配置视图解析器-->
        <bean class="org.springframework.web.servlet.view.InternalResourceViewResolver"
            id="internalResourceViewResolver">
    <!--        前缀-->
            <property name="prefix" value="/WEB-INF/jsp/"/>
    <!--        后缀-->
            <property name="suffix" value=".jsp"/>
        </bean>
</beans>- 在视图解析器中,将所有的视图都放在**/WEB-INF/**目录下,这样可以保证视图安全,因为这个目录下的文件,客户端不能直接访问。
- 创建controller:
package com.zestaken.controller;

import org.springframework.stereotype.Controller;
import org.springframework.ui.Model;
import org.springframework.web.bind.annotation.RequestMapping;

@Controller
@RequestMapping("/HelloController")
public class HelloController {

    //真实访问地址就是:项目名/HelloController/hello1
    @RequestMapping("/hello1")
    public String sayHello(Model model) {
        //向模型中添加属性msg与值,可以在jsp页面中取出并渲染
        model.addAttribute("msg", "hello, springmvc");
        //返回值代表视图:WEB-INF/jsp/hello.jsp
        return "hello";
    }
}@Controller是为了让Spring IOC容器自动扫描到;被这个注解的类中的所有方法,如果返回值是String,并且有具体的页面可以操作,那么就会被视图解析器解析。#@ResquestMapping是为了映射请求路径,这里因为类与方法上都有映射,所以访问时应该是HelloController/hello(类上的映射可以不写)- 方法中声明的Model类型的参数是为了把Action中的数据带到视图层中;
- 方法返回的结果是视图的名称hello,加上==配置文件中的前后缀==变成WEB-INF/jsp/hello.jsp
- 创建视图层:
<%@ page contentType="text/html;charset=UTF-8" language="java" %> <html> <head> <title>Title</title> </head> <body> <h1>${msg}</h1> </body> </html> - 启动tomcat,访问/HelloController/hello1。

Restful风格
- Restful风格:一种软件架构风格、设计风格,而不是标准,只是提供了一组设计原则和约束条件。它主要用于客户端和服务器交互类的软件。基于这个风格设计的软件可以更简洁,更有层次,更易于实现缓存等机制。
- REST即Representational State Transfer的缩写,可译为"表现层状态转化”。REST最大的几个特点为:资源、统一接口、URI和无状态。
- 资源:互联网所有的事物都可以被抽象为资源 。
- 资源操作:使用POST、DELETE、PUT、GET,使用不同方法对资源进行操作。
分别对应 添加、 删除、修改、查询。 - 传统方式操作资源:通过不同的参数来实现不同的效果,方法单一,都是GET或者POST。
http://127.0.0.1/item/queryUser.action?id=1   查询,GET
http://127.0.0.1/item/saveUser.action             新增,POST
http://127.0.0.1/item/updateUser.action          更新,POST
http://127.0.0.1/item/deleteUser.action?id=1 删除,GET或POST- 使用RESTful操作资源 :
- 通过不同的请求方法来实现不同的效果。请求的地址一样,但是因为请求的方式不同,实现的功能不同。
- 可以通过 GET、 POST、 PUT、 PATCH、 DELETE 等方式对服务端的资源进行操作。其中,GET 用于查询资源,POST 用于创建资源,PUT 用于更新服务端的资源的全部信息,PATCH 用于更新服务端的资源的部分信息,DELETE 用于删除服务端的资源。
- 同时隐藏了参数的传递,直接将参数写入到地址中,隐藏了参数名。
- 通过不同的请求方法来实现不同的效果。请求的地址一样,但是因为请求的方式不同,实现的功能不同。
【GET】 /users # 查询用户信息列表

【GET】 /users/1001 # 查看某个用户信息(其中1001就是要用到方法中的参数)

【POST】 /users # 新建用户信息

【PUT】 /users/1001 # 更新用户信息(全部字段)

【PATCH】 /users/1001 # 更新用户信息(部分字段)

【DELETE】 /users/1001 # 删除用户信息- 传统方法实现示例:
package com.zestaken.controller;

import org.springframework.stereotype.Controller;
import org.springframework.ui.Model;
import org.springframework.web.bind.annotation.RequestMapping;

@Controller
public class HelloController {

    @RequestMapping("/hello1")
    public String sayHello(int a, int b,Model model) {
        int res = a + b;
        model.addAttribute("msg", "输出结果为:"+res);
        return "hello";
    }
}- 请求这个方法的路径:
http://localhost:8080/SpringMVC_war_exploded/hello1?a=1&b=2 - Restful风格实现示例:
package com.zestaken.controller;

import org.springframework.stereotype.Controller;
import org.springframework.ui.Model;
import org.springframework.web.bind.annotation.*;

@Controller
public class HelloController {

//    @RequestMapping(value = "/hello1/{a}/{b}",method = RequestMethod.GET)
    @GetMapping("/hello/{a}/{b}")
    public String GETHello(@PathVariable int a, @PathVariable int b, Model model) {
        int res = a - b;
        model.addAttribute("msg", "GET输出结果为:"+res);
        return "hello";
    }

    @PostMapping("/hello/{b}/{a}")
    public String POSTHello(@PathVariable int a, @PathVariable int b, Model model) {
        int res = a - b;
        model.addAttribute("msg", "POST输出结果为:"+res);
        return "hello";
    }
}
}- 将参数的传递放到路径中去:
- 方法的参数必须加上
@PathVariable注解 - 方法的路径中,必须对应方法的参数(名称相同,
{a}对应参数int a),并且用花括号括起来。
- 方法的参数必须加上
- 限制不同的请求方法,只能使用不同的方法
- 一种方法是给
@RequestMapping注解加上method参数 - 一种方法是使用对应请求方法特有的map注解,如,GEI方法对应的
@GETMapping注解。
- 一种方法是给
- 请求GETHello的请求路径:
http://localhost:8080/SpringMVC_war_exploded/hello/1/2- 路径中的参数必须与参数的类型对应。
- 请求生效必须采用GET方法。
重定向和转发
- 法一: ModelAndView对象:设置该对象,根据view的名称,和视图解析器跳转到指定的页面。
- 视图解析器配置示例:
<!-- 配置视图解析器--> <bean class="org.springframework.web.servlet.view.InternalResourceViewResolver" id="internalResourceViewResolver"> <!-- 前缀--> <property name="prefix" value="/WEB-INF/jsp/"/> <!-- 后缀--> <property name="suffix" value=".jsp"/> </bean> </beans>- 页面位置:视图解析器的前缀 + viewName + 视图解析器后缀。
- 高级写法中,ModelAndView对象简化为了Model对象:
@RequestMapping("/hello1") public String sayHello(int a, int b,Model model) { int res = a + b; model.addAttribute("msg", "输出结果为:"+res); return "hello"; }- 在路径前面加上转发或者重定向的前缀,可以实现转发或者重定向(如果不加,==默认是转发==):
@RequestMapping("/hello1") public String sayHello(int a, int b,Model model) { int res = a + b; model.addAttribute("msg", "输出结果为:"+res); //重定向 return "redirect:hello"; } - 法二:==不使用视图解析器==,直接使用SpringMvc实现
- 这种情况下,需要将页面的位置具体出来。
      @RequestMapping("/hello1")
public String sayHello(int a, int b,Model model) {
    int res = a + b;
    model.addAttribute("msg", "输出结果为:"+res);
    return "/WEB-INF/jsp/hello.jsp";
}
* 默认是转发; * 可以在路径前面加前缀,来分别实现转发和重定向。 * 如:@RequestMapping("/hello1") public String sayHello(int a, int b,Model model) { int res = a + b; model.addAttribute("msg", "输出结果为:"+res); //转发 return "forward:/WEB-INF/jsp/hello.jsp"; } @RequestMapping("/hello1") public String sayHello(int a, int b,Model model) { int res = a + b; model.addAttribute("msg", "输出结果为:"+res); //重定向(重定向好像不能访问WEB-INF文件夹下的内容) return "redirect:/index.jsp"; }
接收请求参数和数据回显
- 基本接收参数方式:
package com.zestaken.controller;

import org.springframework.stereotype.Controller;
import org.springframework.ui.Model;
import org.springframework.web.bind.annotation.GetMapping;
import org.springframework.web.bind.annotation.RequestMapping;

@Controller
@RequestMapping("/user")
public class UserController {

    //请求示例:localhost:8080/user/t1 ? name = zhangjie
    @GetMapping("/t1")
    public String test1(String name, Model model) {

        //name接收到前端传进来的参数name
        System.out.println(name);

        //将要传给前端的结果封装到Model对象中,返回给前端
        model.addAttribute(name);

        //视图跳转
        return "test";
    }
}- 前端请求的参数必须与函数的形参名相同才行。
- 可以在需要从前端接收的参数名前加上
@RequestParam("前端传递的参数名")来限定参数的性质。示例:
public String test1(@RequestParam("username") String name, Model model)
//请求示例:localhost:8080/user/t1 ? username = zhangjie- 接收前端的参数:前端传递的参数可以==封装为一个对象==:
//实体类
package com.zestaken.pojo;

public class User {
    public void setId(int id) {
        this.id = id;
    }

    public void setName(String name) {
        this.name = name;
    }

    public int getId() {
        return id;
    }

    public String getName() {
        return name;
    }

    private int id;
    private String name;

    @Override
    public String toString() {
        return "User{" +
                "id=" + id +
                ", name='" + name + '\'' +
                '}';
    }
}

//controller类
@Controller
@RequestMapping("/user")
public class UserController {

    //请求示例:localhost:8080/user/t1 ? id = 1 && name = zhangjie
    @GetMapping("/t1")
    public String test1(User user, Model model) {

        //name接收到前端传进来的参数user
        System.out.println(user.toString());

        //将要传给前端的结果封装到Model对象中,返回给前端
        model.addAttribute(user.toString());

        //视图跳转
        return "test";
    }
}- 接收前端用户传递的参数,判断参数的名字,==假设参数名字直接在方法的形参中定义了,可以直接使用==
- 假设方法中定义的形参是一个对象,则将前端传递的参数与对象中的属性名进行匹配,如果名字一致则将参数写到对象的属性中去,如果不一致匹配不到则该对象的该属性值为空。
- 回显结果到前端:通过ModelAndView对象实现
package com.zestaken.controller;

import org.springframework.stereotype.Controller;
import org.springframework.web.servlet.ModelAndView;

import javax.servlet.http.HttpServletRequest;
import javax.servlet.http.HttpServletResponse;
import java.lang.annotation.Annotation;

public class Controller2 implements Controller {
    public ModelAndView test1(HttpServletRequest httpServletRequest, HttpServletResponse httpServletResponse) {
        ModelAndView modelAndView = new ModelAndView();
        //设置返回给前端的内容
        modelAndView.addObject("msg", "controllertest");
        //设置要响应的前端页面
        modelAndView.setViewName("test");
        return modelAndView;
    }

    @Override
    public String value() {
        return null;
    }

    @Override
    public Class<? extends Annotation> annotationType() {
        return null;
    }
}- 需要实现Controller接口;
- 可以获取请求和响应的参数;
- 通过ModelAndView对象来设置响应给前端的结果,和具体的的前端页面。
- 回显结果到前端:通过Model对象来实现。
- 回显结果到前端:通过ModelMap来实现。
- 三种回显数据的方法的对比:
- Model:只有几种方法,只适用于储存数据,是ModelMap的精简版;
- ModelMap:继承了LinkedMap,除了实现了自身的一些方法,同样的继承LinkedMap方法和特性。功能更齐全。
- ModelAndView:可以在储存数据的同时,进行设置返回的逻辑视图,进行控制展示层的跳转。
后台乱码问题
- 在前端编码方式为utf-8的情况下,因为服务端的编码问题导致经由后台代码的中文输出为乱码。
- 解决方案:使用SpringMVC的乱码过滤器过滤器。
- 在
web.xml中配置SpringMVC的乱码过滤器:
<filter>
    <filter-name>encoding</filter-name>
    <filter-class>org.springframework.web.filter.CharacterEncodingFilter</filter-class>
    <init-param>
        <param-name>encoding</param-name>
        <param-name>utf-8></param-name>
    </init-param>
</filter>
<filter-mapping>
    <filter-name>encoding</filter-name>
    <url-pattern>/</url-pattern>
</filter-mapping>
SSM整合
- maven的pom.xml配置,导入相关依赖包
<?xml version="1.0" encoding="UTF-8"?>
<project xmlns="http://maven.apache.org/POM/4.0.0"
         xmlns:xsi="http://www.w3.org/2001/XMLSchema-instance"
         xsi:schemaLocation="http://maven.apache.org/POM/4.0.0 http://maven.apache.org/xsd/maven-4.0.0.xsd">
    <modelVersion>4.0.0</modelVersion>

    <groupId>com.example</groupId>
    <artifactId>ssm</artifactId>
    <version>1.0-SNAPSHOT</version>
    <name>ssm</name>
    <packaging>war</packaging>

    <properties>
        <maven.compiler.target>1.8</maven.compiler.target>
        <maven.compiler.source>1.8</maven.compiler.source>
        <junit.version>5.6.2</junit.version>
    </properties>

<!--    依赖:junit,数据库驱动,连接池,servlet,jsp,mybatis,mybatis-spring,spring servlet jsp jstl-->
    <dependencies>
<!--        web包-->
        <dependency>
            <groupId>javax</groupId>
            <artifactId>javaee-web-api</artifactId>
            <version>8.0.1</version>
            <scope>provided</scope>
        </dependency>
<!--        junit-->
        <dependency>
            <groupId>org.junit.jupiter</groupId>
            <artifactId>junit-jupiter-api</artifactId>
            <version>${junit.version}</version>
            <scope>test</scope>
        </dependency>
        <dependency>
            <groupId>org.junit.jupiter</groupId>
            <artifactId>junit-jupiter-engine</artifactId>
            <version>${junit.version}</version>
            <scope>test</scope>
        </dependency>

<!--        mysql数据库驱动包, 数据库连接池c3p0-->
        <dependency>
            <groupId>mysql</groupId>
            <artifactId>mysql-connector-java</artifactId>
            <version>8.0.23</version>
        </dependency>
        <dependency>
            <groupId>com.mchange</groupId>
            <artifactId>c3p0</artifactId>
            <version>0.9.5.2</version>
        </dependency>

<!--        servlet jsp-->
        <dependency>
            <groupId>javax.servlet</groupId>
            <artifactId>servlet-api</artifactId>
            <version>2.5</version>
        </dependency>
        <dependency>
            <groupId>javax.servlet.jsp</groupId>
            <artifactId>jsp-api</artifactId>
            <version>2.2</version>
        </dependency>
        <dependency>
            <groupId>javax.servlet</groupId>
            <artifactId>jstl</artifactId>
            <version>1.2</version>
        </dependency>

<!--        mybatis mybatis-spring-->
        <dependency>
            <groupId>org.mybatis</groupId>
            <artifactId>mybatis</artifactId>
            <version>3.5.6</version>
        </dependency>
        <dependency>
            <groupId>org.mybatis</groupId>
            <artifactId>mybatis-spring</artifactId>
            <version>2.0.6</version>
        </dependency>

<!--        spring依赖-->
        <dependency>
            <groupId>org.springframework</groupId>
            <artifactId>spring-webmvc</artifactId>
            <version>5.3.3</version>
        </dependency>
        <dependency>
            <groupId>org.springframework</groupId>
            <artifactId>spring-jdbc</artifactId>
            <version>5.3.4</version>
        </dependency>
    </dependencies>

    <build>
        <plugins>
            <plugin>
                <groupId>org.apache.maven.plugins</groupId>
                <artifactId>maven-war-plugin</artifactId>
                <version>3.3.0</version>
            </plugin>
        </plugins>
<!--        配置静态资源导出问题-->
            <resources>
                <resource>
                    <directory>src/main/java</directory>
                    <includes>
                        <include>**/*.properties</include>
                        <include>**/*.xml</include>
                    </includes>
                    <filtering>false</filtering>
                </resource>
                <resource>
                    <directory>src/main/resources</directory>
                    <includes>
                        <include>**/*.properties</include>
                        <include>**/*.xml</include>
                    </includes>
                    <filtering>false</filtering>
                </resource>
            </resources>
    </build>
</project>- 编写基本目录结构:

一:mybaits层编写
-
连接数据库
-
编写mybatis层配置:
- mybatis-config.xml,并管理
<?xml version="1.0" encoding="UTF-8" ?>
<!DOCTYPE configuration
PUBLIC "-//mybatis.org//DTD Config 3.0//EN"
"http://mybatis.org/dtd/mybatis-3-config.dtd">
<!-- 核心配置文件 -->
<configuration>
<!-- 配置数据源的工作交给spring去做-->
<!-- <properties resource="db.properties">-->
<!-- <property name="password" value="root"/>-->
<!-- </properties>-->
<!-- <environments default="development">-->
<!-- <environment id="development">-->
<!-- <transactionManager type="JDBC"/>-->
<!-- <!–配置数据源–>-->
<!-- <dataSource type="POOLED">-->
<!-- <!–注册驱动,同jdbc–>-->
<!-- <property name="driver" value="${driver}"/>-->
<!-- <!–数据库连接路径–>-->
<!-- <property name="url" value="${url}"/>-->
<!-- <property name="username" value="${username}"/>-->
<!-- <property name="password" value="${password}"/>-->
<!-- </dataSource>-->
<!-- </environment>-->
<!-- </environments>-->
<!-- mybatis的配置文件中可以做配置别名等工作-->
<typeAliases>
<package name="com.zestaken.pojo"/>
</typeAliases>
<!--每一个Mapper.xml文件都需要在这个mybatis核心配置文件中注册-->
<mappers>
<mapper resource="com/zestaken/dao/T_collegeMapper.xml"/>
</mappers>
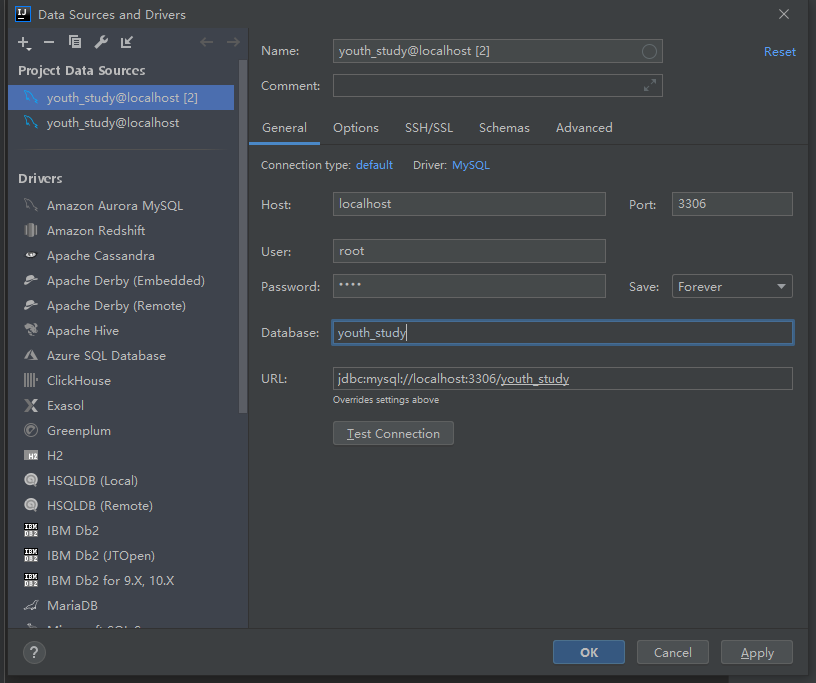
</configuration>- 编写数据库配置文件:database.properties
jdbc.driver = com.mysql.cj.Driver
# 如果使用的是MySQL8.0以上版本,需要加上一个时区配置:serverTimezone=Asia/Shanghai
jdbc.url = jdbc:mysql://localhost:3306/youth_study?serverTimezone=Asia/Shanghai
jdbc.usrname = root
jdbc.password = root- 编写实体类pojo:
package com.zestaken.pojo;

import java.sql.Date;

public class T_college {
    private int id;
    private String name;
    private Date gmt_create;
    private Date gmt_modified;

    public int getId() {
        return id;
    }

    public String getName() {
        return name;
    }

    public Date getGmt_create() {
        return gmt_create;
    }

    public Date getGmt_modified() {
        return gmt_modified;
    }

    public void setId(int id) {
        this.id = id;
    }

    public void setName(String name) {
        this.name = name;
    }

    public void setGmt_create(Date gmt_create) {
        this.gmt_create = gmt_create;
    }

    public void setGmt_modified(Date gmt_modified) {
        this.gmt_modified = gmt_modified;
    }

    @Override
    public String toString() {
        return "T_college{" +
                "id=" + id +
                ", name='" + name + '\'' +
                ", gmt_create=" + gmt_create +
                ", gmt_modified=" + gmt_modified +
                '}';
    }
}- 属性名与数据库字段名相同;
- 并编写每个属性的getter和setter方法
- 编写toString方法

- 类名就是表名配合首字母大写
- 编写操作数据库的方法(dao层)接口,命名为pojo实体类加Mapper,如:T_collegeMapper
package com.zestaken.dao;

import com.zestaken.pojo.T_college;
import org.apache.ibatis.annotations.Param;

import java.util.List;

public interface T_collegeMapper {

    //    增加一个学院
    int addCollege(T_college college);

    //删除一个指定的学院
    int deleteCollege(@Param("collegeID") int id);

    //更新一个学院的信息
    int updateCollege(T_college college);

    //查询一个学院
    T_college queryCollege(@Param("collegeID") int id);

    //查询全部的学院
    List<T_college> queryAllCollege();
}
6.编写对应dao层接口的mapper配置文件:T_collegeMapper.xml
<?xml version="1.0" encoding="UTF-8" ?>
<!DOCTYPE mapper
        PUBLIC "-//mybatis.org//DTD Config 3.0//EN"
        "http://mybatis.org/dtd/mybatis-3-mapper.dtd">
<mapper namespace="com.zestaken.dao.T_collegeMapper">

    <insert id="addCollege" parameterType="T_college">
    insert into youth_study.t_college(id,name)
    value (#{id},#{name});
    </insert>

    <delete id="deleteCollege" parameterType="int">
    delete from youth_study.t_college
    where id = #{collegeID};
    </delete>

    <update id="updateCollege" parameterType="T_college">
    update youth_study.t_college
    set name=#{name}
    where id = #{id};
    </update>

    <select id="queryCollege" resultType="T_college">
    select * form youth_study.t_college
    where id = #{collegeID};
    </select>

    <select id="queryAllCollege" resultType="T_college">
    select * from youth_study.t_college;
    </select>

</mapper>- 绑定mapper,在mybatis-config.xml中配置:
<mappers>
    <mapper resource="com/zestaken/dao/T_collegeMapper.xml"/>
</mappers>
8.编写业务层的接口:
package com.zestaken.service;

import com.zestaken.pojo.T_college;

import java.util.List;

public interface T_collegeService {

    //    增加一个学院
    int addCollege(T_college college);

    //删除一个指定的学院
    int deleteCollege(int id);

    //更新一个学院的信息
    int updateCollege(T_college college);

    //查询一个学院
    T_college queryCollege(int id);

    //查询全部的学院
    List<T_college> queryAllCollege();
}
9.实现业务层的接口:
package com.zestaken.service;

import com.zestaken.dao.T_collegeMapper;
import com.zestaken.pojo.T_college;

import java.util.List;

public class T_collegeServiceImpl implements T_collegeService{

    //service层调dao层实现功能
    private T_collegeMapper t_collegeMapper;

    //方便之后用Spring托管这个对象
    public void setT_collegeMapper(T_collegeMapper t_collegeMapper) {
        this.t_collegeMapper = t_collegeMapper;
    }

    @Override
    public int addCollege(T_college college) {
        return t_collegeMapper.addCollege(college);
    }

    @Override
    public int deleteCollege(int id) {
        return t_collegeMapper.deleteCollege(id);
    }

    @Override
    public int updateCollege(T_college college) {
        return t_collegeMapper.updateCollege(college);
    }

    @Override
    public T_college queryCollege(int id) {
        return t_collegeMapper.queryCollege(id);
    }

    @Override
    public List<T_college> queryAllCollege() {
        return t_collegeMapper.queryAllCollege();
    }
}
Spring层
- 要将Spring相关的所有配置文件整合在到一起(本质上写一个spring的配置文件就足够了,分开写只是为了思路更清晰)
- 可以通过用import配置文件的方法实现:
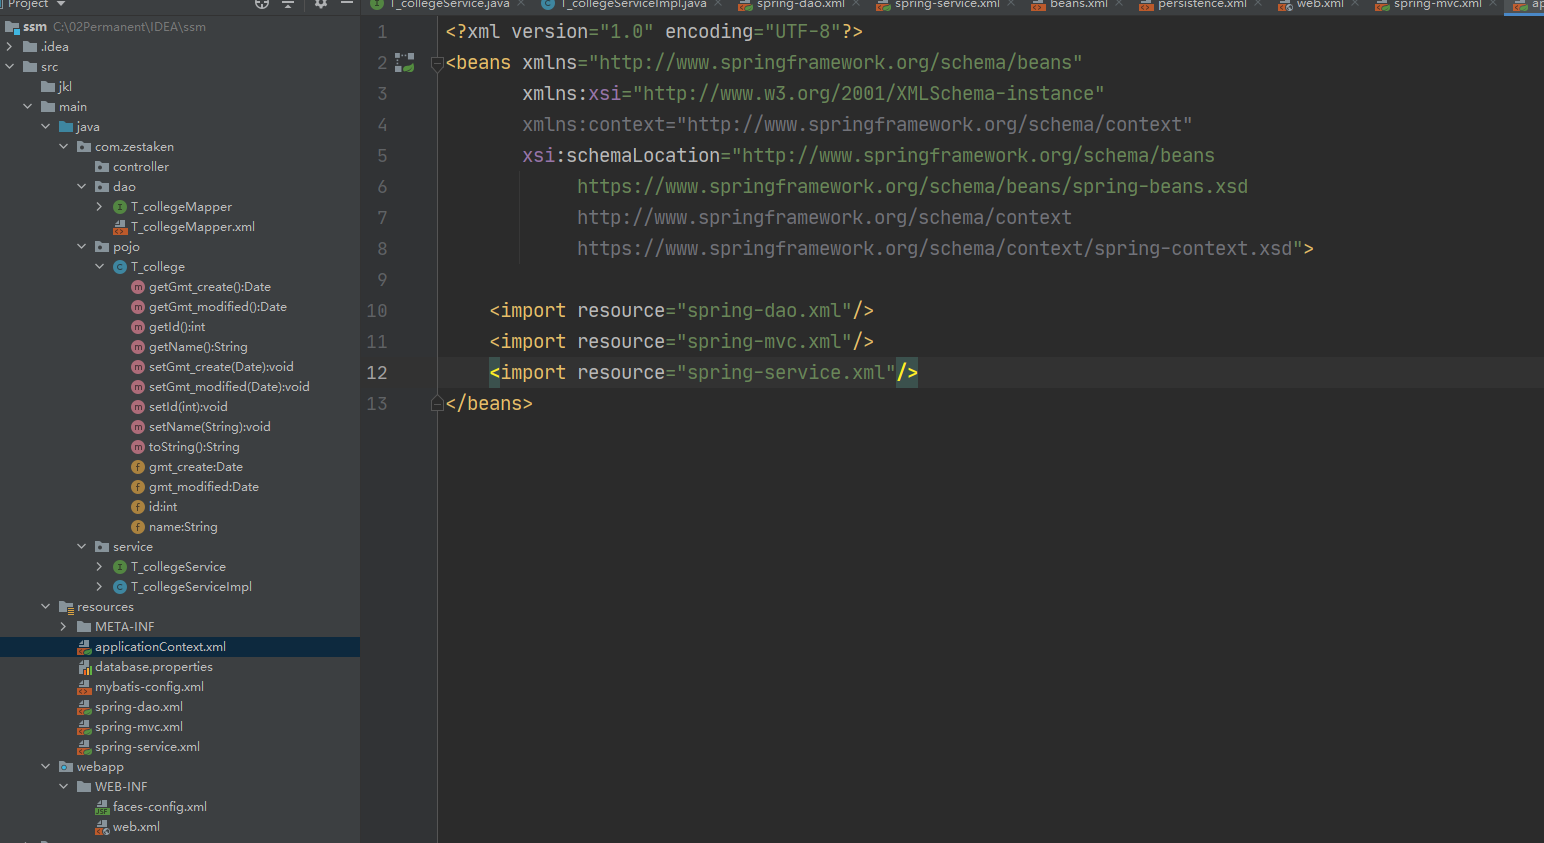
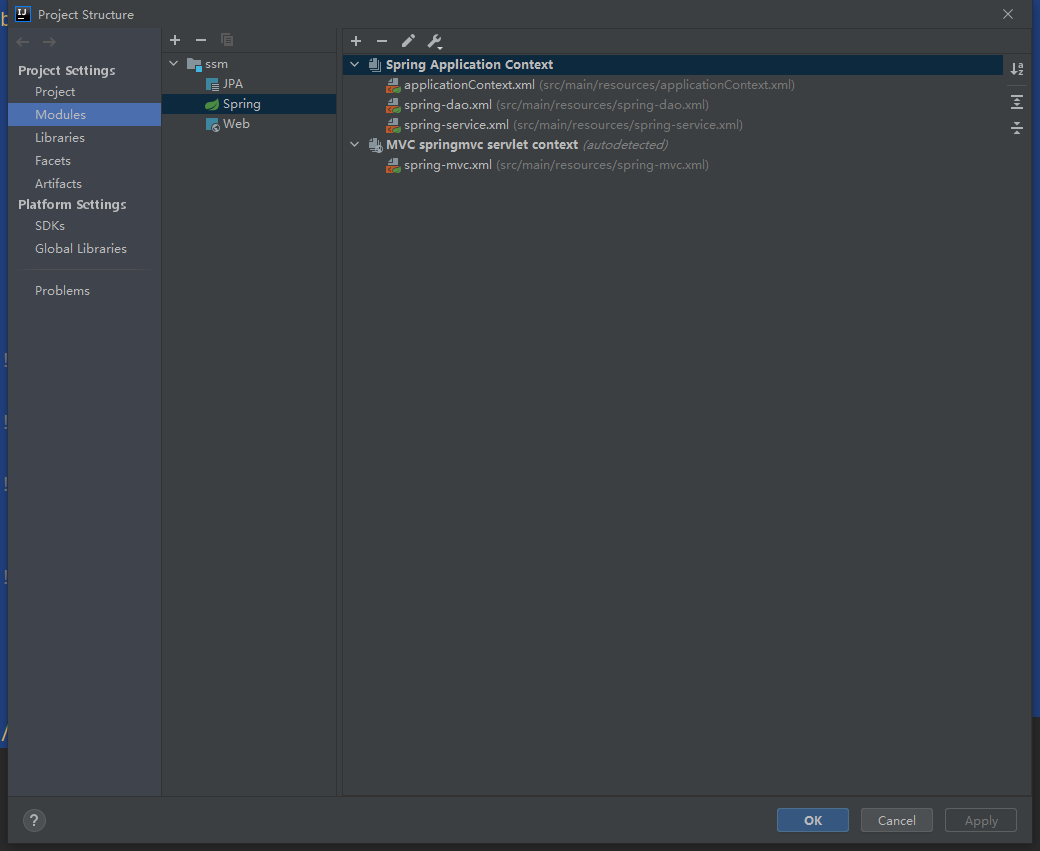
- 也可以利用idea配置实现:
- 可以通过用import配置文件的方法实现:
Spring整合dao层
- 编写spring-dao.xml配置文件:
<?xml version="1.0" encoding="UTF-8"?>
<beans xmlns="http://www.springframework.org/schema/beans"
       xmlns:xsi="http://www.w3.org/2001/XMLSchema-instance"
       xmlns:context="http://www.springframework.org/schema/context"
       xsi:schemaLocation="http://www.springframework.org/schema/beans
            https://www.springframework.org/schema/beans/spring-beans.xsd
            http://www.springframework.org/schema/context
            https://www.springframework.org/schema/context/spring-context.xsd">

<!--    关联数据库配置文件-->
    <context:property-placeholder location="classpath:database.properties"/>

<!--    配置连接池,此处使用c3p0-->
    <bean id="dataSource" class="com.mchange.v2.c3p0.ComboPooledDataSource">
        <property name="driverClass" value="${jdbc.driver}"/>
        <property name="jdbcUrl" value="${jdbc.url}"/>
        <property name="user" value="${jdbc.username}"/>
        <property name="password" value="${jdbc.password"/>

    <!--        c3p0配置-->
        <property name="maxPoolSize" value="30"/>
        <property name="minPoolSize" value="10"/>
        <property name="autoCommitOnClose" value="false"/>
        <property name="checkoutTimeout" value="10000"/>
        <property name="acquireRetryAttempts" value="2"/>
    </bean>

<!--    sqlSessionFactory配置-->
    <bean id="sqlSessionFactory" class="org.mybatis.spring.SqlSessionFactoryBean">
    <!--        绑定数据源-->
        <property name="dataSource" ref="dataSource"/>
    <!--        绑定mybatis的配置文件-->
        <property name="configLocation" value="classpath:mybatis-config.xml"/>
    </bean>

<!--    配置dao接口的扫描包 动态实现Dao接口注入到Spring容器中(不用写接口实现类了)-->
    <bean class="org.mybatis.spring.mapper.MapperScannerConfigurer">
        <property name="sqlSessionFactoryBeanName" value="sqlSessionFactory"/>
        <property name="basePackage" value="com.zestaken.dao"/>
    </bean>
</beans>
Spring整合service层
- 写一个spring-sevice.xml配置文件:
<?xml version="1.0" encoding="UTF-8"?>
<beans xmlns="http://www.springframework.org/schema/beans"
       xmlns:xsi="http://www.w3.org/2001/XMLSchema-instance"
       xmlns:context="http://www.springframework.org/schema/context"
       xsi:schemaLocation="http://www.springframework.org/schema/beans
            https://www.springframework.org/schema/beans/spring-beans.xsd
            http://www.springframework.org/schema/context
            https://www.springframework.org/schema/context/spring-context.xsd">

<!--    扫描service层下的包, 要被扫描的类上面要加上@Compoent(或者更详细的@Service注解)-->
    <context:component-scan base-package="com.zestaken.service"/>

<!--    将service层的业务类注入到Spring,可以通过配置,或者注解实现-->
    <bean id="T_collegeServiceImpl" class="com.zestaken.service.T_collegeServiceImpl">
        <property name="t_collegeMapper" ref="t_collegeMapper"/>
    </bean>

<!--声明式事务配置-->
    <bean id="transactionManager" class="org.springframework.jdbc.datasource.DataSourceTransactionManager">
<!--        注入数据源-->
        <property name="dataSource" ref="dataSource"/>
    </bean>
</beans>- 如果需要aop的配置,也写在这里。
SpringMVC层
- 编写WEB-INF目录下的web.xml配置文件:
<?xml version="1.0" encoding="UTF-8"?>
<web-app xmlns="http://xmlns.jcp.org/xml/ns/javaee"
         xmlns:xsi="http://www.w3.org/2001/XMLSchema-instance"
         xsi:schemaLocation="http://xmlns.jcp.org/xml/ns/javaee http://xmlns.jcp.org/xml/ns/javaee/web-app_4_0.xsd"
         version="4.0">

<!--    DispatchServlet配置-->
    <servlet>
        <servlet-name>springmvc</servlet-name>
        <servlet-class>org.springframework.web.servlet.DispatcherServlet</servlet-class>
        <init-param>
            <param-name>contextConfigLocation</param-name>
<!--            <param-value>classpath:spring-mvc.xml</param-value>-->
<!--            不能只导入Springmvc的配置文件,需要导入所有spring的配置文件,不然有一些bean会找不到-->
            <param-value>classpath:applicationContext.xml</param-value>
        </init-param>
        <load-on-startup>1</load-on-startup>
    </servlet>
    <servlet-mapping>
        <servlet-name>springmvc</servlet-name>
        <url-pattern>/</url-pattern>
    </servlet-mapping>

<!--    乱码过滤配置-->
    <filter>
        <filter-name>encodingFilter</filter-name>
        <filter-class>org.springframework.web.filter.CharacterEncodingFilter</filter-class>
        <init-param>
            <param-name>encoding</param-name>
            <param-value>utf-8</param-value>
        </init-param>
    </filter>
    <filter-mapping>
        <filter-name>encodingFilter</filter-name>
        <url-pattern>*</url-pattern>
    </filter-mapping>

<!--    配置session-->
    <session-config>
        <session-timeout>15</session-timeout>
    </session-config>
</web-app>>- 编写spring-mvc.xml配置文件:
<?xml version="1.0" encoding="UTF-8"?>
<beans xmlns="http://www.springframework.org/schema/beans"
       xmlns:xsi="http://www.w3.org/2001/XMLSchema-instance"
       xmlns:mvc="http://www.springframework.org/schema/mvc"
       xmlns:context="http://www.springframework.org/schema/context"
       xsi:schemaLocation="http://www.springframework.org/schema/beans
            https://www.springframework.org/schema/beans/spring-beans.xsd
            http://www.springframework.org/schema/context
            https://www.springframework.org/schema/comtext/spring-context.xsd
            http://www.springframework.org/schema/mvc
            http://www.springframework.org/schema/mvc/spring-mvc.xsd">

<!--    注解驱动-->
    <mvc:annotation-driven/>
<!--    静态资源过滤-->
    <mvc:default-servlet-handler/>
<!--    扫描包:controller-->
    <context:component-scan base-package="com.zestaken.controller"/>

<!--    视图解析器-->
    <bean class="org.springframework.web.servlet.view.InternalResourceViewResolver">
        <property name="prefix" value="/WEB-INF/jsp/"/>
        <property name="suffix" value=".jsp"/>
    </bean>
</beans>
编写实际项目
- 编写web.xml(WEB-INF)目录下的:
<?xml version="1.0" encoding="UTF-8"?>
<web-app xmlns="http://xmlns.jcp.org/xml/ns/javaee"
         xmlns:xsi="http://www.w3.org/2001/XMLSchema-instance"
         xsi:schemaLocation="http://xmlns.jcp.org/xml/ns/javaee http://xmlns.jcp.org/xml/ns/javaee/web-app_4_0.xsd"
         version="4.0">

<!--    DispatchServlet配置-->
    <servlet>
        <servlet-name>springmvc</servlet-name>
        <servlet-class>org.springframework.web.servlet.DispatcherServlet</servlet-class>
        <init-param>
            <param-name>contextConfigLocation</param-name>
<!--            <param-value>classpath:spring-mvc.xml</param-value>-->
<!--            不能只导入Springmvc的配置文件,需要导入所有spring的配置文件,不然有一些bean会找不到-->
            <param-value>classpath:applicationContext.xml</param-value>
        </init-param>
        <load-on-startup>1</load-on-startup>
    </servlet>
    <servlet-mapping>
        <servlet-name>springmvc</servlet-name>
        <url-pattern>/</url-pattern>
    </servlet-mapping>

<!--    <context-param>-->
<!--        <param-name>contextConfigLocation</param-name>-->

<!--        <param-value>classpath:applicationContext.xml</param-value>-->
<!--    </context-param>-->


<!--    乱码过滤配置-->
    <filter>
        <filter-name>encodingFilter</filter-name>
        <filter-class>org.springframework.web.filter.CharacterEncodingFilter</filter-class>
        <init-param>
            <param-name>encoding</param-name>
            <param-value>utf-8</param-value>
        </init-param>
    </filter>
    <filter-mapping>
        <filter-name>encodingFilter</filter-name>
        <url-pattern>*</url-pattern>
    </filter-mapping>

<!--    配置session-->
    <session-config>
        <session-timeout>15</session-timeout>
    </session-config>

</web-app>- 编写controller:
package com.zestaken.controller;

import com.zestaken.pojo.T_college;
import com.zestaken.service.T_collegeService;
import org.springframework.beans.factory.annotation.Autowired;
import org.springframework.beans.factory.annotation.Qualifier;
import org.springframework.stereotype.Controller;
import org.springframework.ui.Model;
import org.springframework.web.bind.annotation.RequestMapping;

import java.util.List;


@Controller
@RequestMapping("/college")
public class T_collegeController {

    //controller调service层
    @Autowired
    @Qualifier("T_collegeServiceImpl")
    private T_collegeService t_collegeService;

    public void setT_collegeService(T_collegeService t_collegeService) {
        this.t_collegeService = t_collegeService;
    }

    @RequestMapping("/allCollege")
    public  String queryAllCollege(Model model) {
        List<T_college> t_colleges = t_collegeService.queryAllCollege();
        model.addAttribute("msg", t_colleges);
        return "allCollege";
    }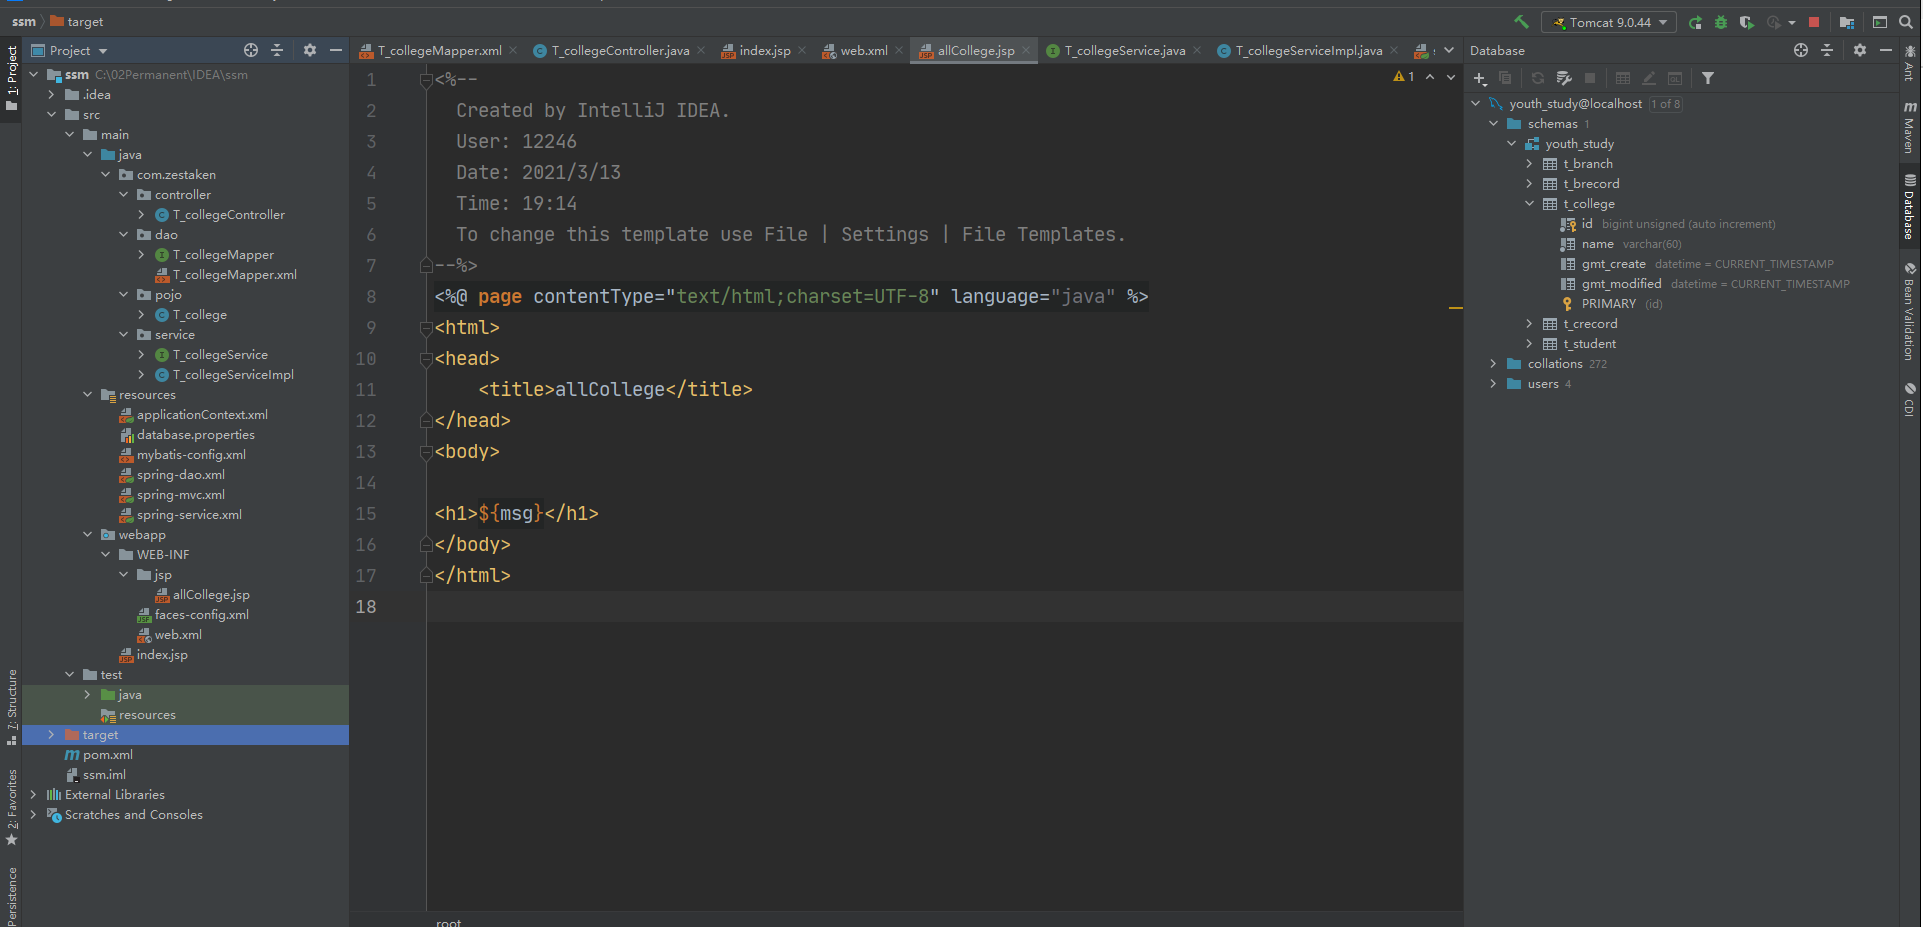
}- 编写页面:

<%--
  Created by IntelliJ IDEA.
  User: 12246
  Date: 2021/3/13
  Time: 19:15
  To change this template use File | Settings | File Templates.
--%>
<%@ page contentType="text/html;charset=UTF-8" language="java" %>
<html>
<head>
    <title>首页</title>
</head>
<body>

<h1>
    <a href="${pageContext.request.contextPath}/college/allCollege">进入学院展示页面</a>
</h1>
</body>
</html>
<%--
Created by IntelliJ IDEA.
User: 12246
Date: 2021/3/13
Time: 19:14
To change this template use File | Settings | File Templates.
--%>
<%@ page contentType="text/html;charset=UTF-8" language="java" %>
<html>
<head>
<title>allCollege</title>
</head>
<body>
<h1>${msg}</h1>
</body>
</html>- 配置Tomcat,启动项目。
- 最后总架构: